Routes
Routes are used to configure which pages to display widgets on a website. Routes are created by identifying URL patterns that can be used to identify pages.
Routes incliude other settings as well:
- adding element validation to help us further divide the page when the URL pattern couldn’t;
- hiding the third party recommendation by adding a style “display: none”;
- filtering the third party recommendations by tracking their refID;
More details on each concepts are below:
Whitelist, Blacklist and Fallback

The recommender will scan through the list of routes in order of Whitelist (routes to display on) then ➡️ Blacklist (routes never to display on) then ➡️ Fallback (common routes for catch-all)
All required routes should be listed on Whitelist, usually categorised into home page (HP); product listing page (PLP); product detail page (PDP) and cart page, as well as any other specific page requirements. Blacklist routes are not required.
We typically do not want widgets to display on checkout and purchase pages. Hence, if we have a route path and element that matches the checkout and purchase pages, we will add the checkout and purchase path to the Blacklist and then create the common routes in the Fallback.
Priority
Within each route set, the routes are sorted by Priority from high to low. The higher one will be matched first.
If there are similar route settings (same path, same param, same element selectors), it will match the one that has higher priority.
Device types

There are two options Desktop and Mobile, default as both selected. In case we want to separate widgets of Desktop and Mobile, we’ll create separate routes for each device type. The device type is returned from the tracker and saved in localStorage when the tag is first triggered on customer’s browser.
Name
The route name can be any string. We recommend naming routes logically according to the pages, for example, Home, PLP, PDP, Cart. If a route is setup for Testing, it’s recommended to have TEST in the route name to differentiate the test links and live routes.
URL Path

We use the regex patterns to parse URL to match the Path we set in each route.
-
Some websites have homepage URL with or without
/at the end of the URL. We’ll need to create two routes for both. -
For general path, we normally use two patterns below:
a.
/*: this is used when the url has one slash, e.g:/abc,/xyz
b./**: this is used when the url has many slashes, e.g:/abc/any/route/aaaa -
Some websites have distinct URLs for their PDP, for example they may have products or .html in the url, so we can configure the path like
**/products/**or/**.html
Query String Parameters

Query String Parameters are used to add unique parameters to a route. This is useful to put the route on testing mode (not displayed to the user without appending the query parameter)
Query String Parameters are used for Test Links, when we add this into the URLs ?<param name>=<param value>
Param name and value could be any string. For example the can be patest and value abcdef1234.
HTML Elements
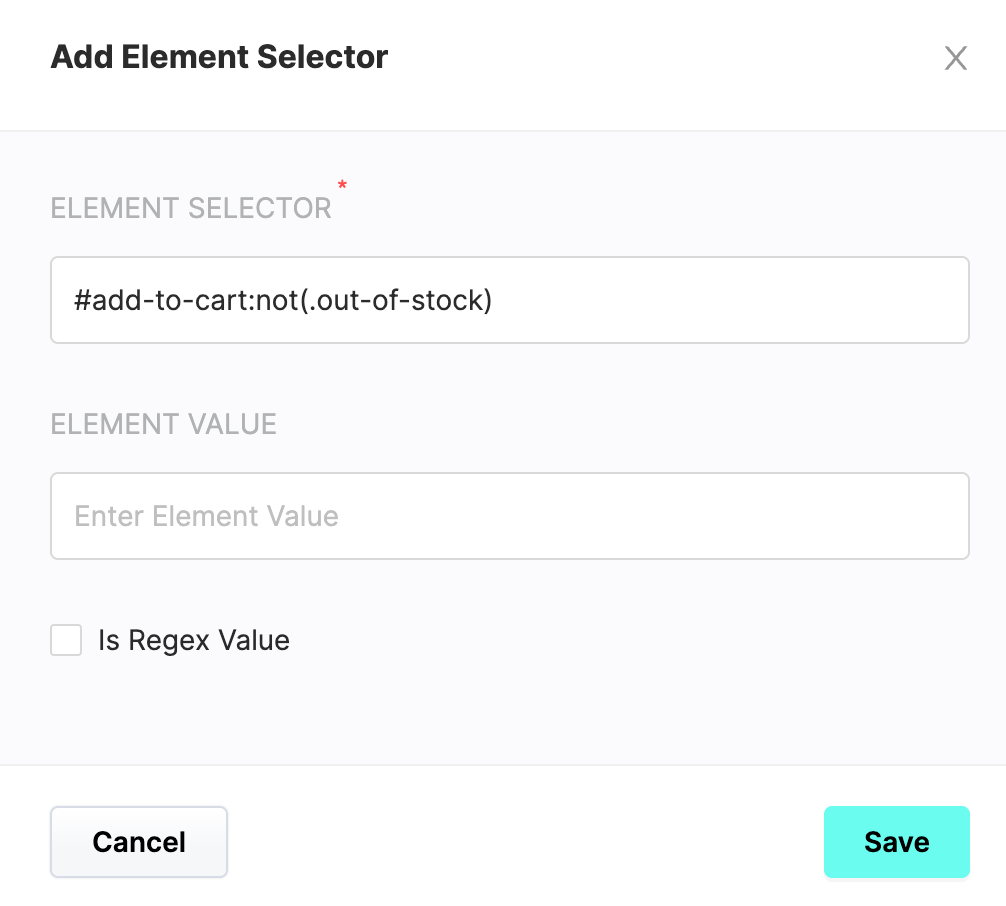
HTML Element Selectors are helpful in identifying a matching route based on the website’s element.

For example, sometimes a path pattern cannot be identified to match only the PDP. In this case you can use a distinct element selector on PDP (such as Add To Cart/ Out of Stock button/ Product Price) to detect the page.

The Element can be selected without content. The selected Element Selector query string character limit is 2048, and if longer it will be rejected by the API. When the Is Regex Value option is selected, the element value should be a regex pattern. It’s recommended to be done by developer or QA that has some HTML/CSS skills.
Route Match Actions > Widgets
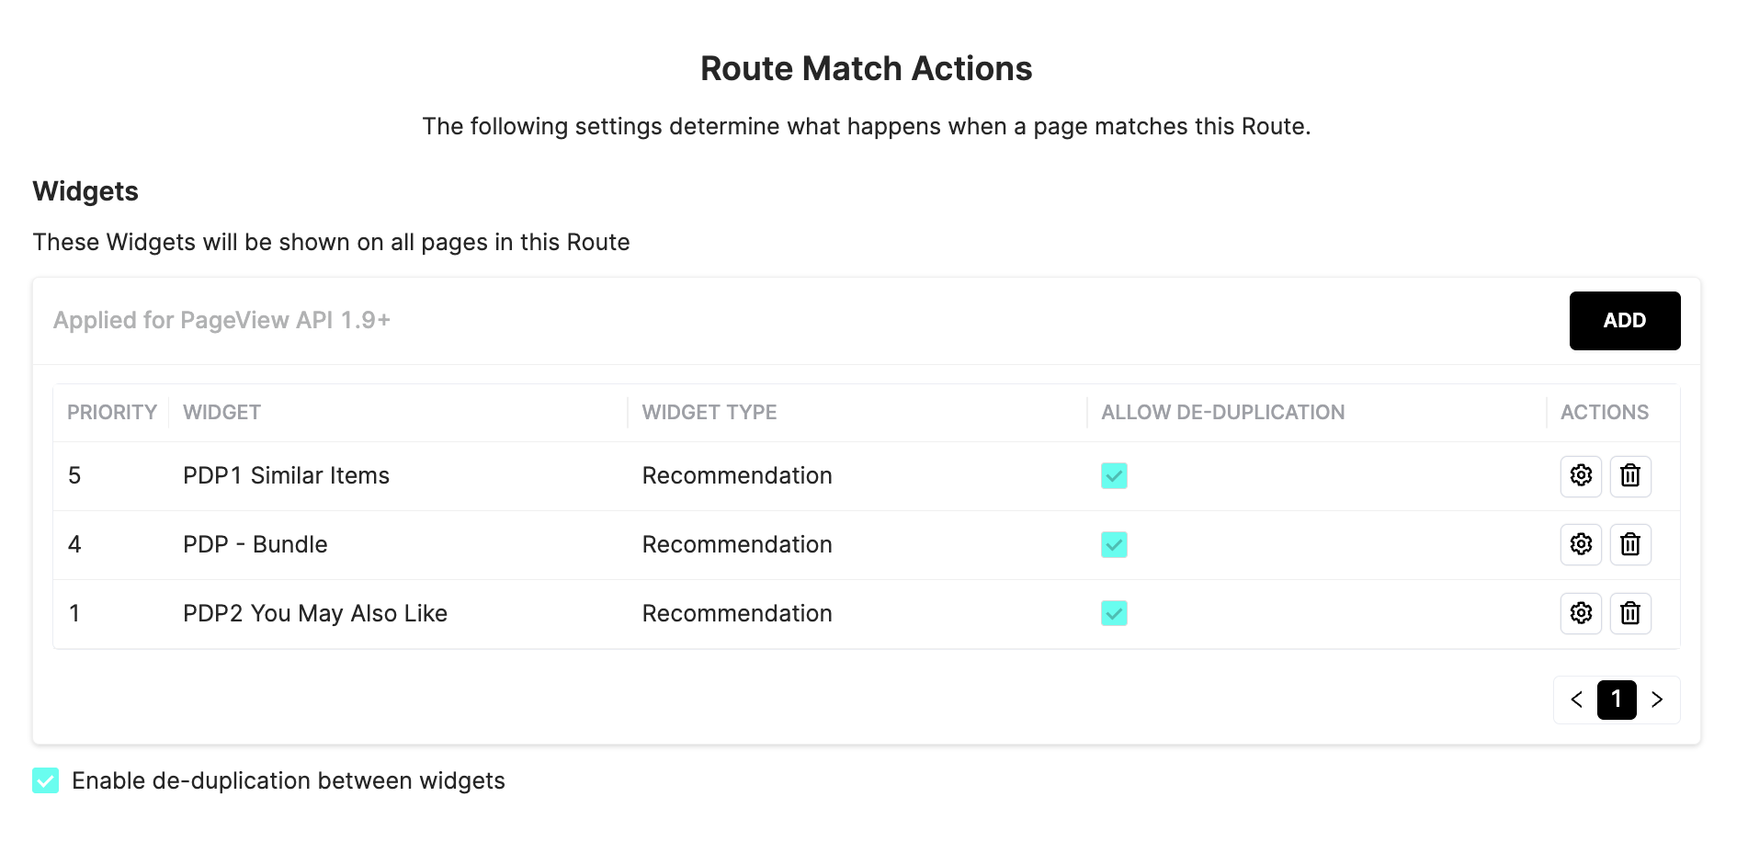
This is the list of widgets to display on the configured route. The list is ordered by Priority (highest number first). This priority will define the results returned from the recommender, not the position of widgets.

The global option Enable de-duplication between widgets needs to be enabled to together with the Allow De-Deduplication in each widget settings. When this feature is enabled, recommender will return the matching items for the higher one first, then dedupe them with the other lower widget’s recommendation.
Normally, we need to dedupe the widgets that are shown as in-page styles. We won’t need to dedupe between in-page panel with minicart or exit intent modal for example.
TEST and LIVE widgets should never be together in the same route as they may have different versions and cause conflict.
Route Match Actions > Third Party Recommenders
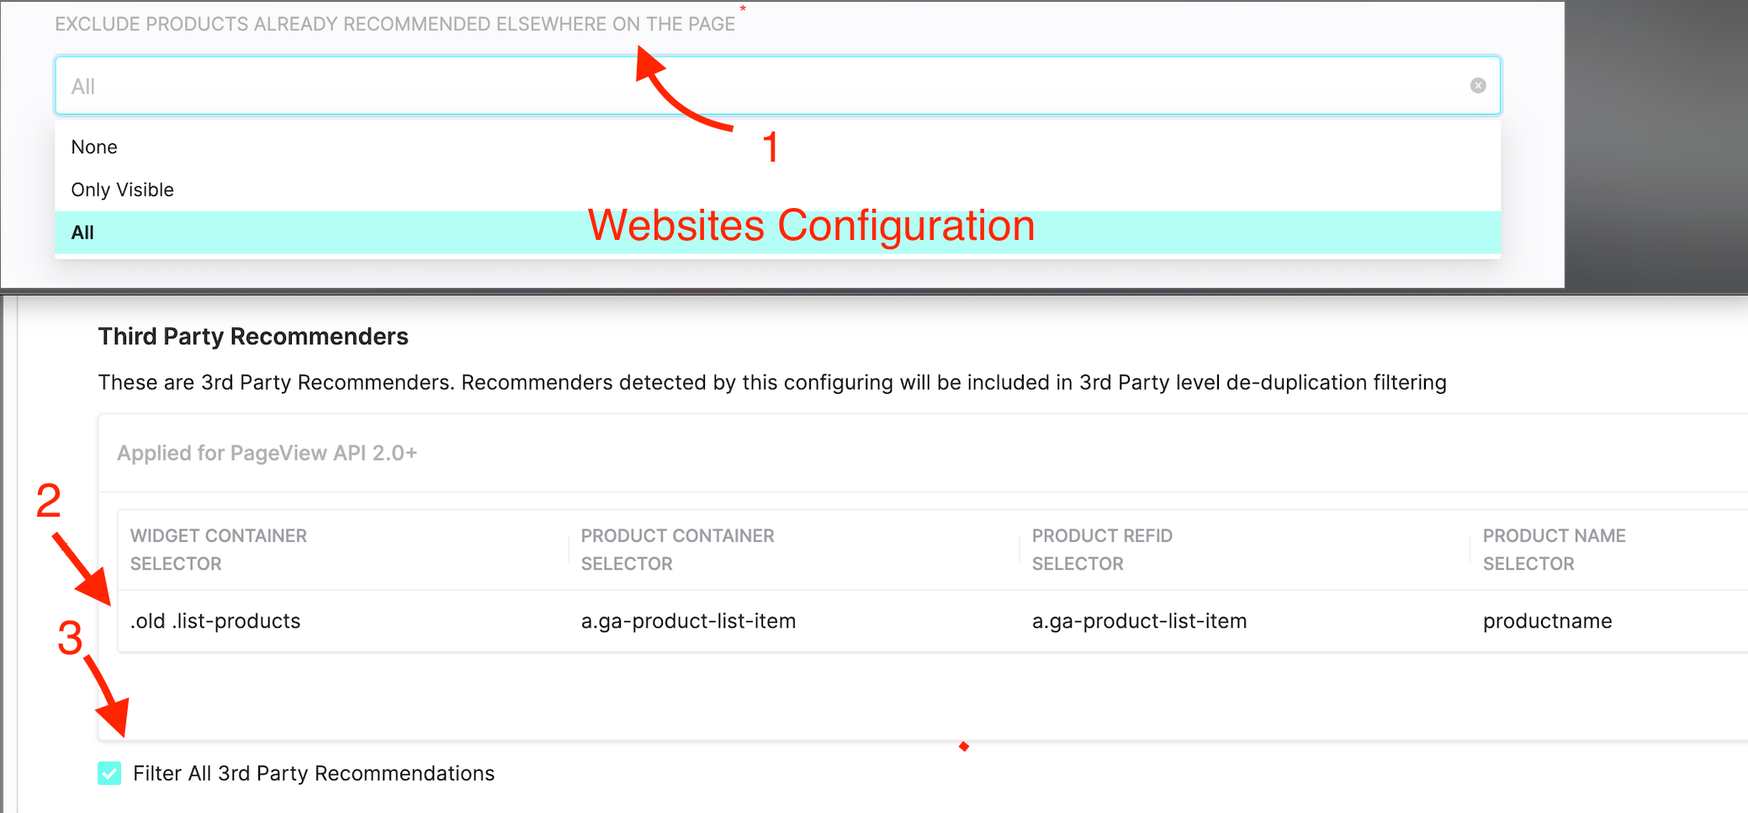
For clients integrated via PA managed Javascript this configuration is used to filter recommendations based on native items on the same page with as PA widgets. The tracker will find the ref_id from the native slots and send them to recommender to do the filtering.
-
Dependent configuration:
-
1/ Websites Configuration > The Exclude products Already Recommended Elsewhere on the Page:
- None: Do nothing
- Only Visible: Only filter the products that have the visible element
- All: All products found from the element configuration.
-
2/ Routes > Third Party Recommenders
-
Widget Container Selector: the selector that includes the whole panel
-
Product Container Selector: the selector that includes the Slot
-
Product RefId Selector: the selector that includes the ref_id that we’re tracking for product.
-
Visible Product Class name: the selector that indicates the slot is visible.
Note:Because the ref_id normally doesn’t locate in a clear element, we need customized code changes from frontend to achieve this configuration. This should be done during the development stage.
-
-
3/ The route-level option Filter All 3rd Party Recommendations
-

Route Match Actions > Hide Elements
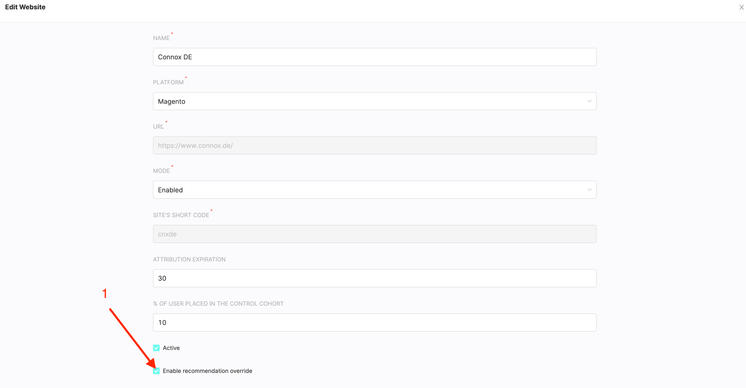
For clients integrated via PA managed Javascript this configuration is used to override the native widgets on the route with PA widgets displaying. By this, the native panel will has an attribute display:none and will be hidden before loading our panels.
Dependent Configurations:
 Click to zoom |
Recommend Container Selector should cover the whole native panel, including title and arrows if have.  Click to zoom |